Get started with payment widget
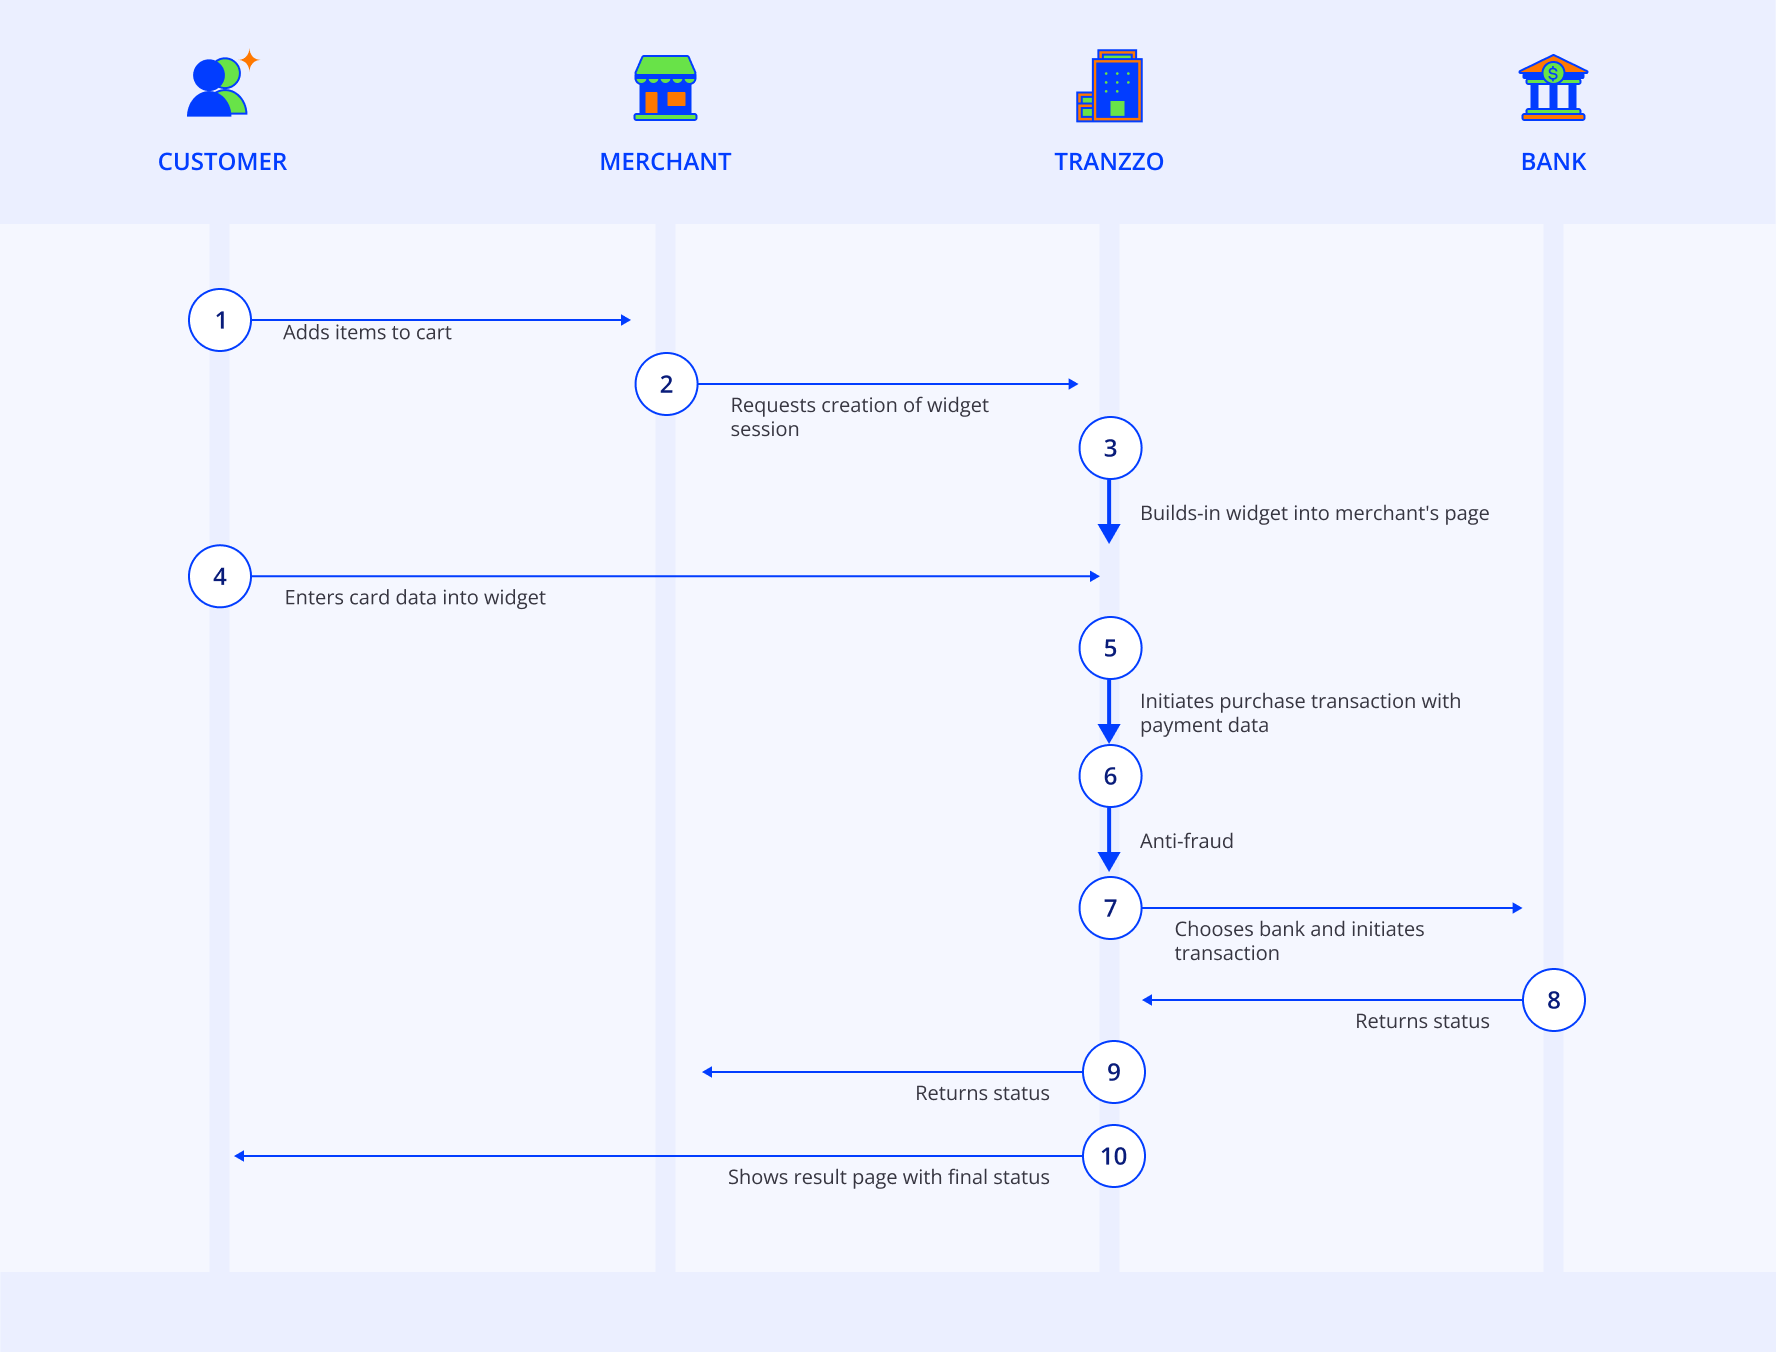
The payment widget provides a seamless way to accept payments, allowing customers to complete transactions without leaving your website. Integrated directly into your webpage, the widget eliminates the need for PCI DSS certification. Thus, the payment process using the payment widget occurs seamlessly on your website, avoiding redirection to a hosted checkout page.
Interaction format:

Features
- Functions seamlessly on both desktop and mobile devices.
- Supports diverse payment methods, including card payments, Apple Pay, and Google Pay™.
- Accommodates both one-step and two-step payment processes.
- It allows initiating recurring payments.
- Integrates seamlessly with taxation using the SBCR feature.
- Offers two display modes on your website:
popup- a pop-up window featuring the payment widget.embedded- an integrated window with the payment widget.
Explore the functionalities of both display modes and test the payment widget's features by following this link.
When using hosted checkout in iframe mode or a payment widget, for security reasons, the Apple Pay method is only supported on devices with Safari version 17 or higher.
The Google Pay payment method is not supported when using a solution that displays the checkout in WebView mode in mobile apps on Android. To use this method, we recommend integrating through the Mobile SDK.
To introduce the payment widget, you need to integrate its library and invoke the initialization function.
Example of how to connect the library and initialize the widget:
<script src="https://gcdn.tranzzo.com/static/payment-widget/payment-widget.js"></script>
<script>
    PaymentWidget.init({
        apiKey: 'YOUR_API_KEY',
        mode: 'popup',
        payment: {
            type: 'pay',
            amount: 1.99,
            currency: 'UAH'
        }
    });
</script>
When utilizing the mode:'embedded' it is essential to include the selector parameter. This parameter enables you to specify the HTML element on the page where the widget will be presented.
Example of widget initialization with mode:'embedded':
<div id="widget"></div>
<script>
    const widget = PaymentWidget.init({
        apiKey: 'YOUR_API_KEY',
        mode: 'embedded',
        selector: '#widget',
        payment: {
            type: 'pay',
            amount: 1.99,
            currency: 'UAH'
        }
    });
</script>
When using a one-step payment process, the type: 'pay' must be passed in the payment widget initialization request.
When using a two-step payment process with pre-authorization (holding) of funds on the customer's bank account, it is necessary to pass the type: 'hold' in the request to initialize the payment widget.
Request example for two-step payment process:
<script>
    const widget = PaymentWidget.init({
        apiKey: 'YOUR_API_KEY',
        mode: 'popup',
        payment: {
            type: 'hold',
            amount: 1.99,
            currency: 'UAH'
        }
    });
</script>
To capture the payment or void the pre-authorization in the two-step payment process through the widget, you can utilize the corresponding API requests or leverage the functionalities provided in the merchant portal.
Depending on the region of operation, the financial regulator may require the placement of merchant information in the payment widget, such as the name, registration number, IBAN.